Deep Learning model to detect Colon Cancer in the early stage

What if we can detect anomalies of the colon at an early stage to prevent colon cancer? We are now in a technology era that it’s capable of doing impressive things that we didn’t imagine before. The use of artificial intelligence can detect more abnormalities than a conventional exam. Physicians should take advantage of this.
According to The American Cancer Society, in the United States, colorectal cancer is the third leading cause of cancer-related deaths in men and in women, and the second most common cause of cancer deaths. It’s expected to cause about 51,020 deaths during 2019.
Inspired by the #AISTARTUPCHALLENGE created by Siraj Raval, I decided to join the challenge! You can check it out at his Instagram account (Siraj Raval). The dynamic is to create an app that uses AI to solve a problem, get 3 paying customers for your app and submit it to win different prizes.
I will start with this healthcare project that classifies 8 different tissues in histological images of human colorectal cancer.
Colorectal Histology MNIST
Let’s get to know more about the dataset I will be using. I got this dataset at Kaggle and it contains a collection of textures in histological images of human colorectal cancer. It has about 5,000 histological RGB samples of 150X150 px, divided into eight tissue categories (specified by the folder name):
- Tumor
- Stroma
- Complex
- Lympho
- Debris
- Mucosa
- Adipose
- Empty
My goal is to identify each category. You can also create a model that classifies between Normal and Benign, but in this case, let’s identify all the different anomalies.
FastAi Model
The model will be created in PyTorch and the fastai library. I’m taking the FastAi course and am learning different deep learning techniques. You can read more about this course in the following link:
I love this library because it simplifies the training process and delivers accurate models.
First, let’s import the libraries needed to create or model, the Vision library is important for this computer vision project.
from fastai import *
from fastai.vision import *
from pathlib import Path
In the next lines, I’m creating a DataBunch object that will be used for training the classifier. The dataset is in the colon2 folder that contains 8 subfolders, one per class.
FastAi has a nice and complete image transformation library written from scratch in PyTorch. I will use it for the data augmentation. Remember that the model needs to be fed with different kind of images, adding some differences to the original ones, such as rotation, zoom, flip, and lighting, etc.
I’m applying a little bit of data augmentation to the images in the ds_fms function: do_flip, max_lighting, max_rotate, and max_zoom.
data = ImageDataBunch.from_folder(path=Path('colon2/').resolve(), train='.', valid_pct=0.2, dl_tfms=get_transforms(do_flip=True, max_lighting=0.1, max_rotate=180, max_zoom=1.05), num_workers=0, bs=16, size=224).normalize(imagenet_stats)If you want to see the results after applying transforms to the dataset, use the following code:
Suppose we want to apply flip to our dataset:
dl_tfms = get_transforms(do_flip=True);We are telling the function to apply the transforms to that image and defining the function to display the images with the applied transforms:
def get_ex(): return open_image('colon2/01_TUMOR/10009_CRC-Prim-HE-03_009.tif_Row_301_Col_151.jpg')def plots_f(rows, cols, width, height, **kwargs):
    [get_ex().apply_tfms(dl_tfms[0], **kwargs).show(ax=ax) for i,ax in enumerate(plt.subplots(
        rows,cols,figsize=(width,height))[1].flatten())]
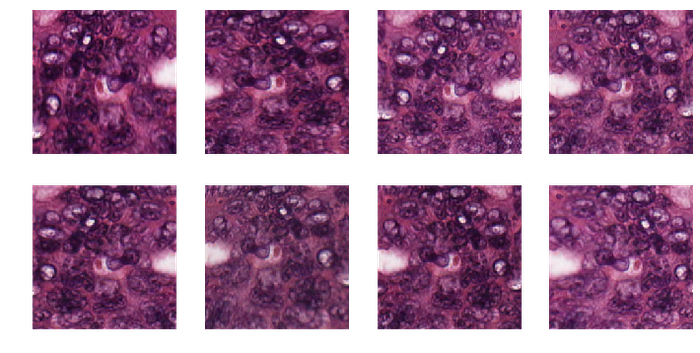
Flip
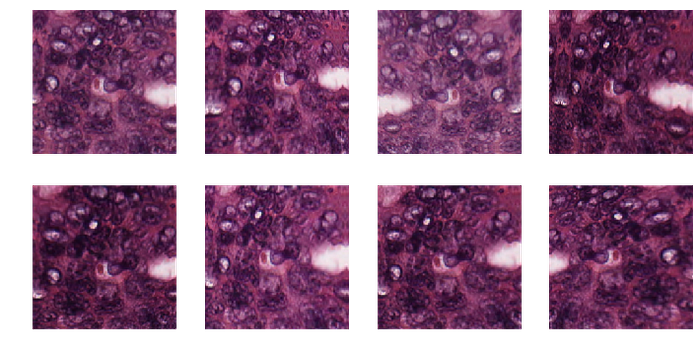
Lighting
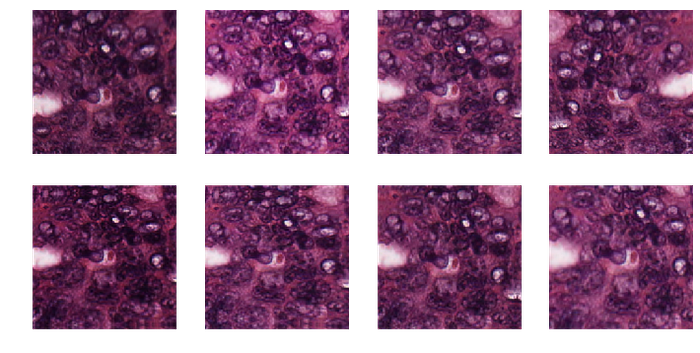
Zoom
Warp

I’m using a pre-trained model called ResNet 34, so the target size of our pictures is 224, which is the size this model uses.
data = ImageDataBunch.from_folder(path=Path('colon2/').resolve(), train='.', valid_pct=0.2, dl_tfms=get_transforms(do_flip=True, max_lighting=0.1, max_rotate=30, max_zoom=1.05, max_warp=0.1), num_workers=0, bs=16, size=224).normalize(imagenet_stats)If you want to see a few images, you can use DataBunch.show_batch. The rows argument is the number of rows and columns you want to display.
data.show_batch(rows=3, figsize=(9,9))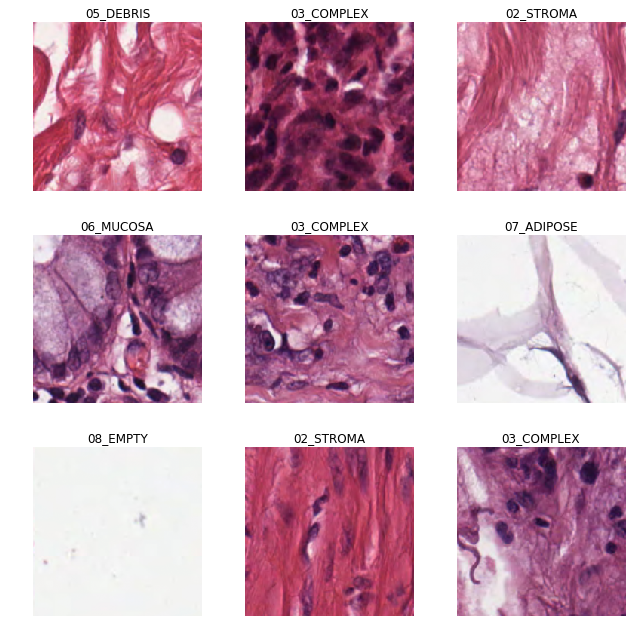
Now, let’s create our learner object to prepare for the training process:
learn_34 = cnn_learner(data, models.resnet34, metrics=[accuracy, error_rate])
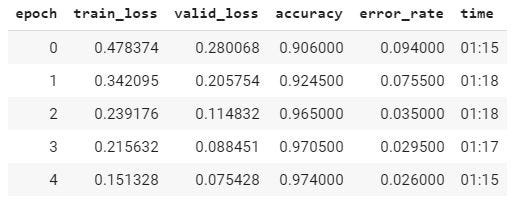
learn_34.fit_one_cycle(5)As you can see, I’m calling the Resnet34 pre-trained model and defining the metrics, in this case, I want to display the accuracy and error_rate to see how the model is doing. I will run 5 epochs and see the results:
Let’s see the predictions:
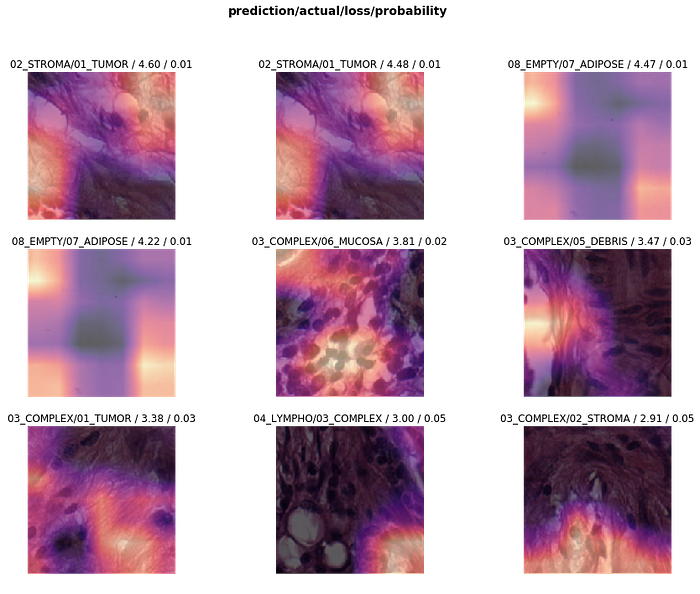
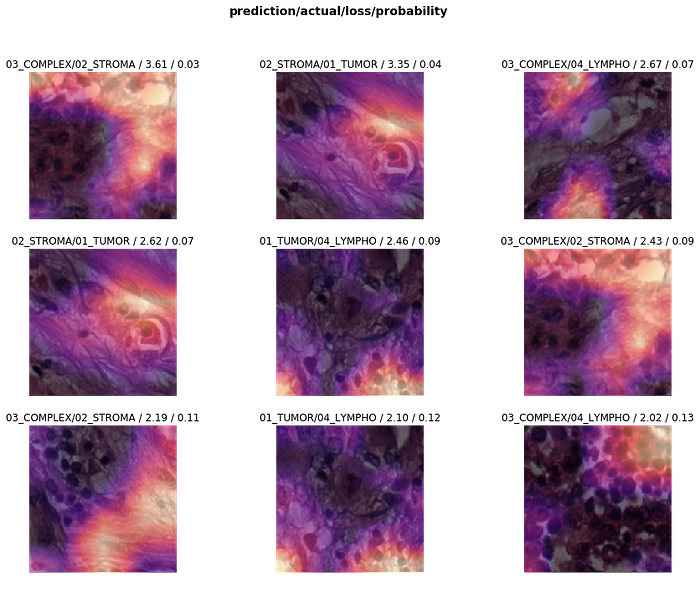
I recommend using the Confusion matrix to see which classes the model is struggling with and misclassifying them:
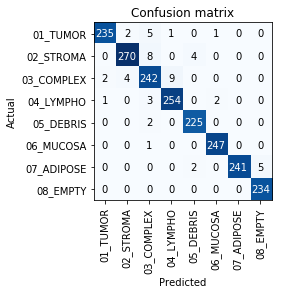
The model is having problems to classify between Lympho and Complex, and Complex and Stroma.
Let’s get a larger pre-trained model to learn more features from the dataset. I picked ResNet152 (okay, my fav!!). Let’s see the results:
learn_152 = cnn_learner(data, models.resnet152, metrics=[accuracy, error_rate])
learn_152.fit_one_cycle(5)
Accuracy and error_rate improved with a larger model.
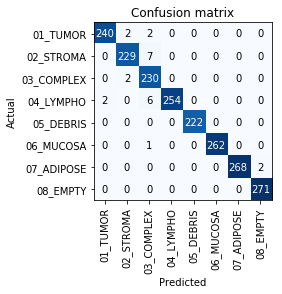
You can see in the Confusion matrix, that the model is still wrong classifying between Complex and Stroma and Complex and Lympho. This is just a matter of fine tuning the model such as changing data augmentation or trying different epochs and learning rate. I feel good with 98.80% accuracy.
Conclusions
- It may be useful to learn more about what data augmentations are used for histopathological images
- I’m sure, we just need time to get more accurate models to detect cancer at an early stage and get good treatment to remove it. More data needs to be fed to these models.
- Next thing to do is to create a web app in Render so people can use the model with their own images
References
FastAi Documentation
Colorectal Histology MNIST
Key Statistics for Colorectal Cancer