How to Use Etherscan

Etherscan is a very useful tool that anyone using the Ethereum network should know how to use, but many don’t and that puts them at a disadvantage. This post shows you the basics of using Etherscan — from exploring your Ethereum wallet to reading token contracts.
What is Etherscan?
Etherscan is what is known as a block explorer. A block explorer is a service that keeps track of all wallets, balances and transactions on a particular blockchain, with Etherscan being the most popular block explorer on Ethereum.
Information available on Etherscan includes;
- What crypto assets are held in a wallet.
- What transactions and smart contract interactions have taken place from a particular Ethereum address.
- Token contract data (e.g. contract address, smart contracts, ticker, total supply, circulating supply, logos, website, social media links, and even the source code).
- Live transactions taking place on the blockchain.

What can Etherscan do?
At its most basic, Etherscan lets you see what assets you hold in any of your Ethereum addresses. This is particularly useful if you have a non-custodial Ethereum wallet, that is an Ethereum wallet that you own the private keys for as, even if the wallet application itself is unavailable or shows a zero balance for some reason, you can always verify that your tokens are safe.
Exploring your wallet address (or anyone else’s for that matter)
Your chosen wallet (in this case Numio) always has an Ethereum address associated with it.
It looks something like this: 0xfe908cD986846C3bC2e450022e73a401629dA0BA
Lets visit etherscan.io and see what we can learn about this address.
https://etherscan.io/address/0xfe908cD986846C3bC2e450022e73a401629dA0BA

At the top of the page you can see the “Overview”, where you can find:
- The wallet address.
- The balance in Ethereum & it’s price in USD.
- The balance of ERC-20 tokens and their price.
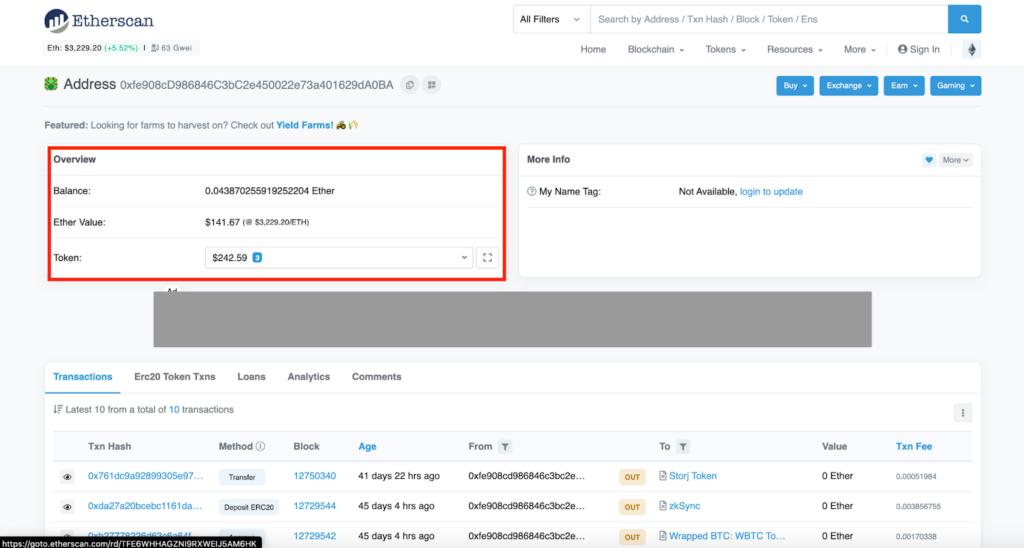
Below that is a box with various tabs.
- Transactions
- Erc20 Token Txns
- Loans
- Analytics
- Comments
The first tab (Transactions) shows all transactions that have used Ethereum. This may be ETH transactions or transactions that have required Gas.
The second tab (Erc20 Token Txns) shows all transactions of ERC-20 tokens that have both been incoming and outgoing.
The third tab (Loans) shows you any loans that you may have taken out using the platforms Compound, AAVE, Cream, Maker or Curve.
The fourth tab (Analytics) gives you various analytics for your wallet, such as your balance over time or fees that have been paid.
The fifth tab is ‘comments’. Anyone can leave a comment here and often use this for posting warnings that a particular wallet may be involved in a scam.
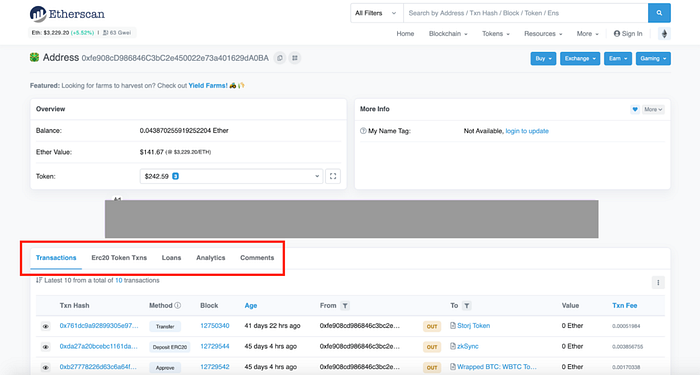
Exploring Your Transactions
Let’s click on the Transactions tab and take a look at the most recent transaction.

- Txn Hash: this is a unique string of numbers that identifies a transaction on the blockchain.
- Method: The primary function the transaction triggered on a smart contract, this could indicate that the transaction was a Deposit or Transfer, or some other kind of interaction with a Smart Contract.
- Block: transactions are grouped together and recorded in ‘blocks’ which are constantly appended on the blockchain. This column tells you what block the transaction was a part of in that chain.
- Age: how long ago the transaction was included in the blockchain.
- From: the address from which the transaction originated.
- To: the address that the transaction transferred ETH to or the contract that the transaction interacted with.
- In the Transactions tab this will only show the recipient address if the transaction was in ETH. If the transaction was in an Ethereum token then the name or address of that token will show (this is because you are not technically sending tokens to a recipient; you are instead updating entries in the token contract that record who owns tokens).
- If you want to see the address for a token transaction then you need to select the ERC Token Txn tab.
- Value: the value of the transaction in ETH — how much ETH was sent. It should be noted that this only shows ETH Transactions and so may show 0 (zero). The ERC-20 Token Txns tab shows the value of any ERC-20 tokens that may have been made.
- Txn Fee: the Gas fee paid to make the transaction.
Transaction Details
Click on the Transaction Tab for the most recent transaction and we get taken to a new page giving you detailed information about that transaction.
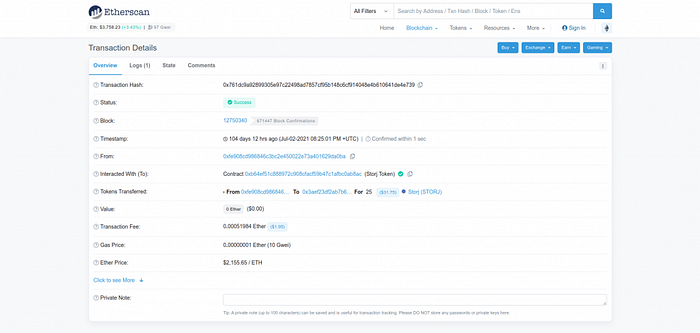
- Transaction Hash: the full hash of the transaction as explained above.
- Status: this tells you if the transaction was successful or if it failed. If the transaction is not yet included in the blockchain, it will say “pending”.
- Block: transactions are grouped together and recorded in ‘blocks’ which are constantly appended on the blockchain. This column tells you what block the transaction was a part of in that chain.
- From: the address from which the transaction originated.
- Interacted With (To): this is the contract that the transaction interacted with. In this case it was the Storj contract as the transaction was sending STORJ tokens and the Storj contract had to be updated to reflect this state change.
- Tokens Transferred: the transaction originating address, the transaction receiving address, and the value of tokens transferred.
- Value: The value of the transaction in ETH. It should be noted that this only shows ETH Transactions and so may show 0 (zero) if no ETH was sent.
- Transaction Fee: the Gas fee paid to make the transaction.
- Gas Price: the price of Gas at the time when the transaction was made.
- Ether Price: the value of ETH at the time of the transaction.
- Nonce: If you “click to see more”, you can see the transaction nonce. This is “number only used once” that increases by one every transaction your wallet makes. The nonce is important if you want to attempt to cancel or replace a pending transaction. To do so, you can simply resubmit the same transaction with higher gas while manually setting the nonce to the same as that of the transaction you wish to replace.
- Input Data: This is the data that you submitted within your transaction. You can think of these parameters as instructions given to a smart contract, such as “swap 100 USDC into ETH as long as the price doesn’t change by more than 1%”
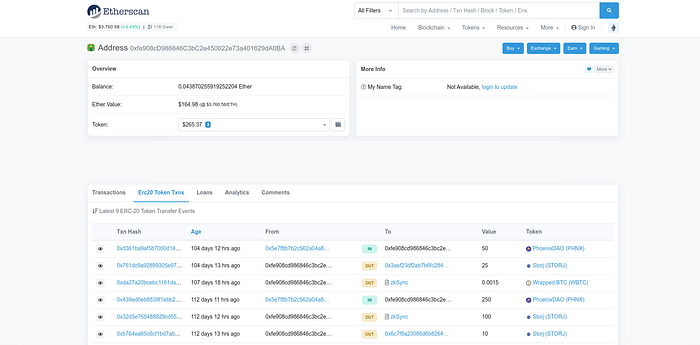
ERC-20 Token Txns
This tab is no different from the Transactions tab except it only shows ERC-20 token transactions and is therefore a quicker and easier way to find those transactions.
Token Contract Interaction
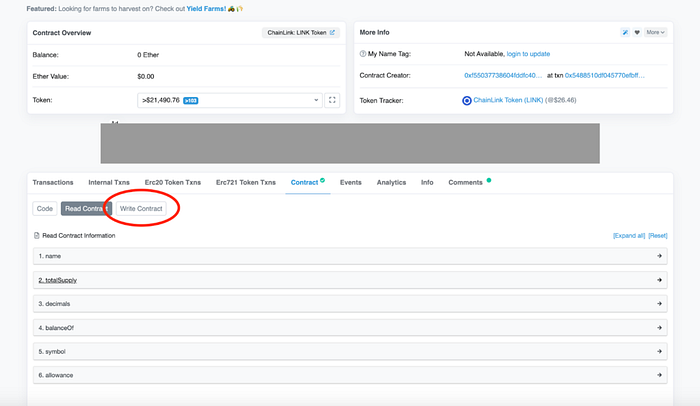
Etherscan is far more powerful than a resource for looking at wallets, it can view and interact with smart contracts.
Let’s take a look at the Chainlink “contract address” page on Etherscan: https://etherscan.io/address/0x514910771af9ca656af840dff83e8264ecf986ca

Then select the ‘Read Contract’ button.

By selecting ‘Read Contract’ you are able to query real-time information for the token.
- name — this is the full name of the project.
- totalSupply — this is how many tokens were created during the launch of the contract — note that the actual amount of tokens depends on the number in the next section*.
- decimals — how many decimal places the token has.
*The Chainlink totalSupply is 1000000000.000000000000000000 and the decimals are 18. This means that you must count back 18 places to get the total number of tokens.
In the case of Chainlink this will be 1,000,000,000, with 18 decimal points behind it (1,000,000,000.000000000000000000) or you can click the number and Etherscan will bring up a handy unit converter.
- balanceOf — you can enter any Ethereum address here and see how many tokens it holds.
- symbol — this is the short name, or ticker, for the token (e.g. LINK).
- allowance — this is where you can see if other wallets have been given permission to make transactions on your behalf.
For example, if you add your wallet address as the ‘owner’, and the contract address for Uniswap as the ‘spender’, you can see if you have given permission for Uniswap to make swaps on your behalf for that particular token.
It should be noted that the ‘Read Contract’ tab on some token contract pages may have more or less input fields depending on their use, and how complicated their smart contract is. In this post we will only look at some of the most basic functions.
Now let’s look at the ‘Write Contract’ button, which is found right next to the ‘Read Contract’ button. It is here that you can interact directly with the token smart contract. Why is this important? If you are interacting with a DeFi platform whose website goes down, you can still permissionlessly interact with any smart contracts.
First up — click ‘Connect to Web3’ and connect to your Metamask wallet.
- approve — this tab allows you to manually approve an address making a transaction on your behalf (e.g. Uniswap).
- transferFrom — this allows you to make a direct transfer of tokens from any address that you have permission to make transfers from, to another address.
You must remember the decimals from ‘read contract’ so if, for example, you want to send three (3) LINK, which has 18 decimals, you would type ‘3’ in the _value box, press the + button and ‘add’ 18 zeroes.
- transfer — this allows you to make a direct transfer of tokens from your connected web3 address to another address.
Review and Revoke Ethereum Token Approvals
Sometimes it is necessary to give trusted dapps the ability to spend your tokens so that the dapp smart contracts can access your tokens. This requires an “approve transaction.” In many cases, dapps will ask you to approve an near-infinite amount for spending so that you don’t need to spend time and gas every time you interact with the dapp. The problem with this is that you are at risk if the contract you approve is malicious, or if a hacker gets control of a proxy dapp contract and changes the code. This could lead to someone gaining control of your assets with the freedom to transact your tokens at will.
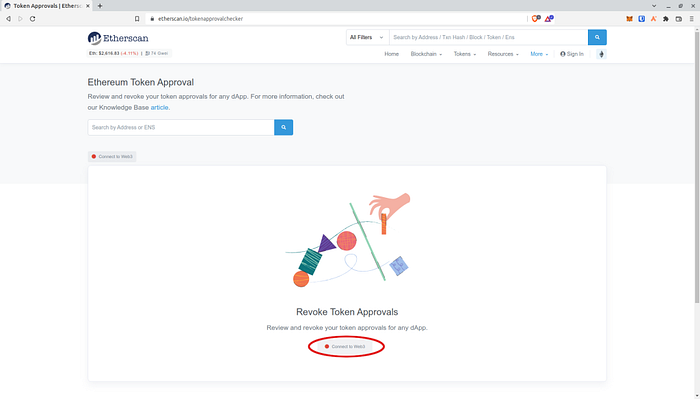
To prevent this you can use the Revoke Ethereum Token Approvals feature in Etherscan which you should check periodically to review and remove any dapps that may have been exploited, that you don’t recognize, or that you don’t routinely use.
How to revoke:
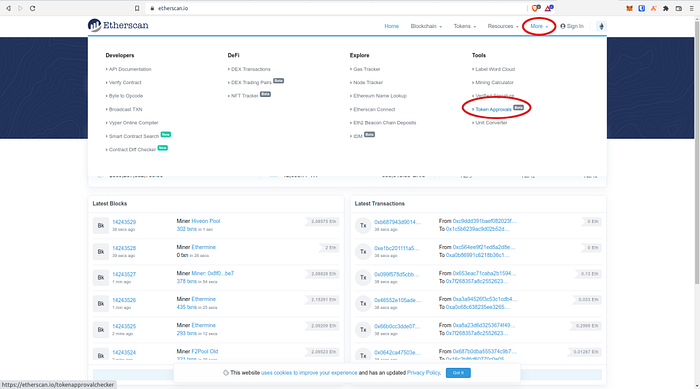
- Visit Etherscan and click on the ‘More’ dropdown and then ‘Token Approvals’. Or you can visit — https://etherscan.io/tokenapprovalchecker
2. Click the Connect to web3 button and then connect using MetaMask or Wallet Connect.
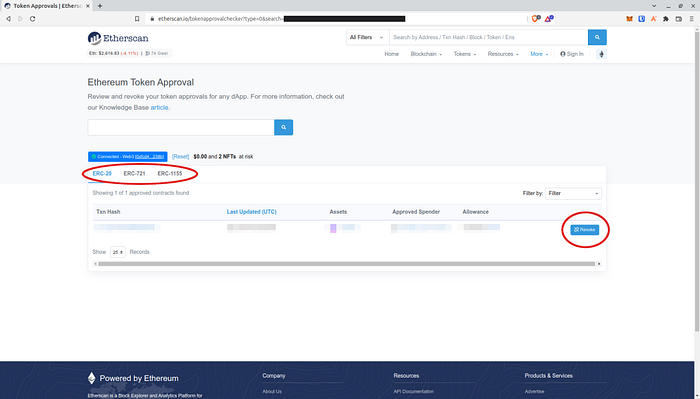
3. Check through the tabs (ERC-20, ERC-721, ERC-1155) and click the ‘Revoke’ button for any smart contracts you want to remove — you will have to make a transaction to revoke access.
Remember, always research any smart contracts you give access to and don’t jump in as soon as you see something. Wait for the vast community of developers to check it out, especially those random airdrops and vampire attacks. They might not be as safe as they first appear to be.
Stay safe out there.
Photo by Emily Morter on Unsplash

